Written and reviewed by A Pomsky Editorial Team. Originally published 2026-07-26; substantively reviewed July 26, 2026.
Training boundary: Use humane, reward-based methods and protect safety with management. Pain, panic, aggression, a bite history, or serious handling risk requires a veterinarian or qualified behavior professional. Read the editorial policy.
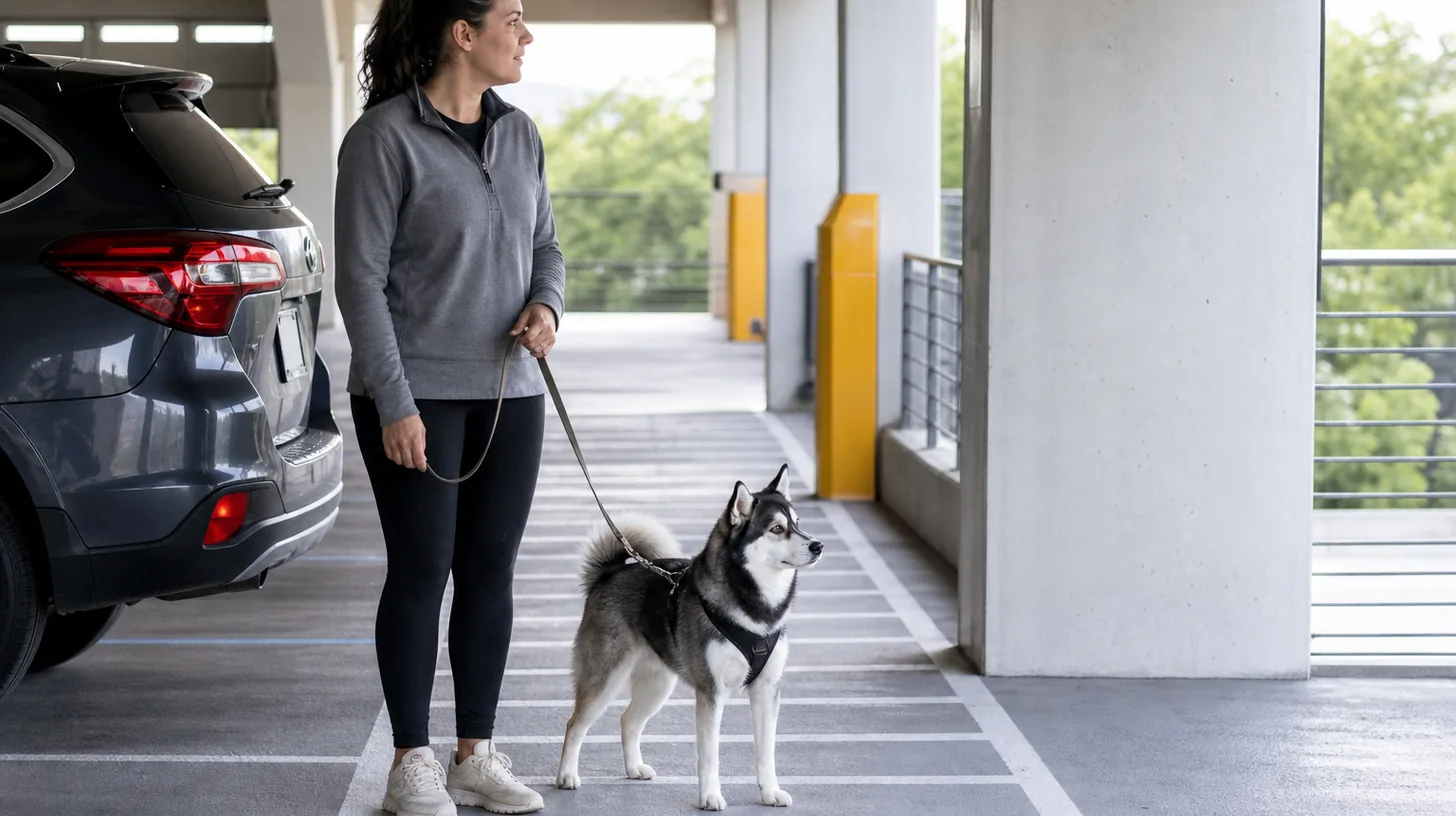
Direct answer: Plan the path from the parking bay to an authorized pedestrian exit before arrival. Choose a bay with a safer dog-side door, attach fitted equipment inside the closed vehicle and scan traffic before opening. Use one dedicated handler, marked walkways and clear sightlines; avoid ramps, payment gates and vehicle lanes. Choose elevators or stairs deliberately, abort after route or equipment changes, and reverse the same sequence when loading the Pomsky.
A parking garage mixes parked and moving vehicles, blind corners, ramps, columns, payment lanes, automatic gates, elevators, stairs, exhaust, noise, and changing light. The safest Pomsky route begins before a vehicle door opens. Attach fitted equipment inside the secured vehicle, assign one handler, identify a protected pedestrian route and abort point, maintain sightlines, and reverse the same controlled sequence when returning to load.
Plan the Route Before Arrival
Identify legal parking, pedestrian exits, elevators, stairs, restricted areas, payment lanes, blind corners, lighting, vehicle flow, and an alternate route.
A second capable adult can verify the boundary during early practice or higher-risk situations. That person should follow the same sequence and avoid adding prompts, handling, or access that changes the task. The shared standard remains a direct vehicle-to-protected-exit transition completed with secure equipment, one handler, clear sightlines, no ramp or gate conflict, and a controlled return loading sequence. In this routine, step 1 is the plan the route before arrival decision.
Do not convert this step into a stress test. The principal avoidable risks are loose dog, opening toward traffic, blind corner, reversing vehicle, ramp, payment arm, rolling gate, elevator threshold, stair conflict, exhaust, spill, broken glass, crowding, or divided attention. Write down garage level, bay, route, lighting, traffic, dog equipment, door side, sightline, ramp, gate, elevator or stair, surface hazard, body language, abort point, loading, and recovery; a short factual note is more useful than a reassuring guess. Record the result of plan the route before arrival before continuing.
Choose a Bay That Protects Door Movement
Park where the dog-side door can open away from live traffic when possible and avoid ramp edges, loading zones, gates, corners, and obstructed sightlines.
Perform this check before adding the next variable. The target remains a direct vehicle-to-protected-exit transition completed with secure equipment, one handler, clear sightlines, no ramp or gate conflict, and a controlled return loading sequence. Work in a legally parked vehicle with current fitted dog equipment, attentive handler, known pedestrian route, good lighting, manageable traffic, authorized exit, and alternate plan. If the setup cannot preserve that condition, simplify it or stop rather than relying on speed or physical control. In this routine, step 2 is the choose a bay that protects door movement decision.
Stop when the expected condition is absent or the situation begins to depend on force, luck, or an open boundary. Specifically avoid loose dog, opening toward traffic, blind corner, reversing vehicle, ramp, payment arm, rolling gate, elevator threshold, stair conflict, exhaust, spill, broken glass, crowding, or divided attention. The follow-up record should cover garage level, bay, route, lighting, traffic, dog equipment, door side, sightline, ramp, gate, elevator or stair, surface hazard, body language, abort point, loading, and recovery. Record the result of choose a bay that protects door movement before continuing.
Attach Equipment Inside the Closed Vehicle
Confirm harness or collar fit, short leash, identification, handler grip, and cabin clearance before any exterior door opens.
Use an observable pass condition: the relevant item is checked, the boundary is closed, and the Pomsky can remain safe without being used as a test. This protects the main objective, a direct vehicle-to-protected-exit transition completed with secure equipment, one handler, clear sightlines, no ramp or gate conflict, and a controlled return loading sequence, while leaving a clear point at which the caregiver can step back. In this routine, step 3 is the attach equipment inside the closed vehicle decision.
The absence of an incident is not proof that the arrangement is sound. Recheck for loose dog, opening toward traffic, blind corner, reversing vehicle, ramp, payment arm, rolling gate, elevator threshold, stair conflict, exhaust, spill, broken glass, crowding, or divided attention. Document garage level, bay, route, lighting, traffic, dog equipment, door side, sightline, ramp, gate, elevator or stair, surface hazard, body language, abort point, loading, and recovery so a later caregiver can distinguish a passed step from one that was skipped. Record the result of attach equipment inside the closed vehicle before continuing.
Scan Before Opening the Door
Check approaching and reversing vehicles, lights, sounds, people, carts, other animals, spills, glass, heat, and the complete first pedestrian segment.
Keep the sequence repeatable across caregivers. Say what is being checked, complete it, and return equipment and people to neutral before continuing. In this page's context, success means a direct vehicle-to-protected-exit transition completed with secure equipment, one handler, clear sightlines, no ramp or gate conflict, and a controlled return loading sequence; it does not mean proving that a known risk can be tolerated. In this routine, step 4 is the scan before opening the door decision.
If the Pomsky cannot remain comfortable or the equipment and environment cannot remain controlled, end the attempt. Do not proceed through loose dog, opening toward traffic, blind corner, reversing vehicle, ramp, payment arm, rolling gate, elevator threshold, stair conflict, exhaust, spill, broken glass, crowding, or divided attention. Capture garage level, bay, route, lighting, traffic, dog equipment, door side, sightline, ramp, gate, elevator or stair, surface hazard, body language, abort point, loading, and recovery before deciding what changes next. Record the result of scan before opening the door before continuing.
Exit With One Dedicated Handler
The handler controls the Pomsky and door sequence without carrying bulky items, paying, using a phone, managing children, or greeting others.
Treat this as one part of the complete routine, not an isolated trick. The surrounding setup is a legally parked vehicle with current fitted dog equipment, attentive handler, known pedestrian route, good lighting, manageable traffic, authorized exit, and alternate plan. A clean transition reduces ambiguity and makes it easier to notice when the dog, equipment, environment, or records differ from the previous attempt. In this routine, step 5 is the exit with one dedicated handler decision.
Do not convert this step into a stress test. The principal avoidable risks are loose dog, opening toward traffic, blind corner, reversing vehicle, ramp, payment arm, rolling gate, elevator threshold, stair conflict, exhaust, spill, broken glass, crowding, or divided attention. Write down garage level, bay, route, lighting, traffic, dog equipment, door side, sightline, ramp, gate, elevator or stair, surface hazard, body language, abort point, loading, and recovery; a short factual note is more useful than a reassuring guess. Record the result of exit with one dedicated handler before continuing.
Use Marked Pedestrian Space and Sightlines
Stay in authorized walkways, pause before columns and corners, avoid ramp travel, and maintain distance from engines, tires, gates, and moving equipment.
Pause long enough to inspect the result rather than assuming the action worked. Look at the dog, the physical boundary, and the next movement available to the caregiver. Continue only when the arrangement still supports a direct vehicle-to-protected-exit transition completed with secure equipment, one handler, clear sightlines, no ramp or gate conflict, and a controlled return loading sequence. In this routine, step 6 is the use marked pedestrian space and sightlines decision.
Stop when the expected condition is absent or the situation begins to depend on force, luck, or an open boundary. Specifically avoid loose dog, opening toward traffic, blind corner, reversing vehicle, ramp, payment arm, rolling gate, elevator threshold, stair conflict, exhaust, spill, broken glass, crowding, or divided attention. The follow-up record should cover garage level, bay, route, lighting, traffic, dog equipment, door side, sightline, ramp, gate, elevator or stair, surface hazard, body language, abort point, loading, and recovery. Record the result of use marked pedestrian space and sightlines before continuing.
Choose Elevator or Stairs Deliberately
Use the route the dog and caregiver can manage safely, follow property rules, control thresholds and doors, and avoid escalators or unauthorized shortcuts.
A second capable adult can verify the boundary during early practice or higher-risk situations. That person should follow the same sequence and avoid adding prompts, handling, or access that changes the task. The shared standard remains a direct vehicle-to-protected-exit transition completed with secure equipment, one handler, clear sightlines, no ramp or gate conflict, and a controlled return loading sequence. In this routine, step 7 is the choose elevator or stairs deliberately decision.
The absence of an incident is not proof that the arrangement is sound. Recheck for loose dog, opening toward traffic, blind corner, reversing vehicle, ramp, payment arm, rolling gate, elevator threshold, stair conflict, exhaust, spill, broken glass, crowding, or divided attention. Document garage level, bay, route, lighting, traffic, dog equipment, door side, sightline, ramp, gate, elevator or stair, surface hazard, body language, abort point, loading, and recovery so a later caregiver can distinguish a passed step from one that was skipped. Record the result of choose elevator or stairs deliberately before continuing.
Abort After Traffic or Equipment Change
Return to the secured vehicle or protected area after crowding, blocked route, loose dog, spill, alarm, poor lighting, equipment problem, or lost handler capacity.
Perform this check before adding the next variable. The target remains a direct vehicle-to-protected-exit transition completed with secure equipment, one handler, clear sightlines, no ramp or gate conflict, and a controlled return loading sequence. Work in a legally parked vehicle with current fitted dog equipment, attentive handler, known pedestrian route, good lighting, manageable traffic, authorized exit, and alternate plan. If the setup cannot preserve that condition, simplify it or stop rather than relying on speed or physical control. In this routine, step 8 is the abort after traffic or equipment change decision.
If the Pomsky cannot remain comfortable or the equipment and environment cannot remain controlled, end the attempt. Do not proceed through loose dog, opening toward traffic, blind corner, reversing vehicle, ramp, payment arm, rolling gate, elevator threshold, stair conflict, exhaust, spill, broken glass, crowding, or divided attention. Capture garage level, bay, route, lighting, traffic, dog equipment, door side, sightline, ramp, gate, elevator or stair, surface hazard, body language, abort point, loading, and recovery before deciding what changes next. Record the result of abort after traffic or equipment change before continuing.
Reverse the Sequence During Loading
Pause at the bay with sightline, unlock only when ready, load the Pomsky first under control, close the door, verify restraint, then handle belongings.
Use an observable pass condition: the relevant item is checked, the boundary is closed, and the Pomsky can remain safe without being used as a test. This protects the main objective, a direct vehicle-to-protected-exit transition completed with secure equipment, one handler, clear sightlines, no ramp or gate conflict, and a controlled return loading sequence, while leaving a clear point at which the caregiver can step back. In this routine, step 9 is the reverse the sequence during loading decision.
Do not convert this step into a stress test. The principal avoidable risks are loose dog, opening toward traffic, blind corner, reversing vehicle, ramp, payment arm, rolling gate, elevator threshold, stair conflict, exhaust, spill, broken glass, crowding, or divided attention. Write down garage level, bay, route, lighting, traffic, dog equipment, door side, sightline, ramp, gate, elevator or stair, surface hazard, body language, abort point, loading, and recovery; a short factual note is more useful than a reassuring guess. Record the result of reverse the sequence during loading before continuing.
Record the Bay and Recovery
Confirm dog, equipment, doors, windows, cabin, route outcome, breathing, paws, behavior, and parking location before driving.
Keep the sequence repeatable across caregivers. Say what is being checked, complete it, and return equipment and people to neutral before continuing. In this page's context, success means a direct vehicle-to-protected-exit transition completed with secure equipment, one handler, clear sightlines, no ramp or gate conflict, and a controlled return loading sequence; it does not mean proving that a known risk can be tolerated. In this routine, step 10 is the record the bay and recovery decision.
Stop when the expected condition is absent or the situation begins to depend on force, luck, or an open boundary. Specifically avoid loose dog, opening toward traffic, blind corner, reversing vehicle, ramp, payment arm, rolling gate, elevator threshold, stair conflict, exhaust, spill, broken glass, crowding, or divided attention. The follow-up record should cover garage level, bay, route, lighting, traffic, dog equipment, door side, sightline, ramp, gate, elevator or stair, surface hazard, body language, abort point, loading, and recovery. Record the result of record the bay and recovery before continuing.
When to Stop and Escalate
Stop when the Pomsky, caregiver, equipment, records, or environment no longer supports a direct vehicle-to-protected-exit transition completed with secure equipment, one handler, clear sightlines, no ramp or gate conflict, and a controlled return loading sequence. Do not improvise through loose dog, opening toward traffic, blind corner, reversing vehicle, ramp, payment arm, rolling gate, elevator threshold, stair conflict, exhaust, spill, broken glass, crowding, or divided attention. Seek garage staff or property management for routes and hazards, emergency services for immediate vehicle danger, and veterinary care for injury, breathing concern, or exposure. Bring the factual observations already collected rather than recreating the event.
Before another attempt, review garage level, bay, route, lighting, traffic, dog equipment, door side, sightline, ramp, gate, elevator or stair, surface hazard, body language, abort point, loading, and recovery. Resume only after the responsible person, physical setup, and controlling instructions are clear. A stop is part of the protocol: it preserves useful evidence and prevents uncertainty from becoming exposure.
Keep the Routine Current
Recheck the complete setup whenever the dog, household, product, instructions, environment, or purpose changes. The intended outcome remains a direct vehicle-to-protected-exit transition completed with secure equipment, one handler, clear sightlines, no ramp or gate conflict, and a controlled return loading sequence, not a perfect-looking performance. Use the newest primary instruction, retain dated records, and retire superseded assumptions so every caregiver begins from the same current plan.
Sources reviewed
Each source is used only for the claim scopes listed below. None establishes a guaranteed Pomsky outcome or replaces individual professional assessment.
- U.S. Centers for Disease Control and Prevention: Pet Emergency Preparedness - Supports: evacuation planning; pet records; emergency supplies; disaster readiness. Limit: Local emergency authority instructions take priority.
- American Animal Hospital Association: Lifestyle and Safety Assessment - Supports: appropriate confinement; leash, collar and harness planning; lifestyle-specific safety review. Limit: Equipment selection must account for the individual dog's anatomy, behavior, health, and environment.
- American Kennel Club: The Importance of a Well-Fitting Harness - Supports: harness measurement; strap clearance; shoulder movement; escape and chafing checks. Limit: No harness corrects pulling by itself or fits every body shape; pain, rubbing, or gait change needs reassessment.