Written and reviewed by A Pomsky Editorial Team. Originally published 2026-07-26; substantively reviewed July 26, 2026.
Training boundary: Use humane, reward-based methods and protect safety with management. Pain, panic, aggression, a bite history, or serious handling risk requires a veterinarian or qualified behavior professional. Read the editorial policy.
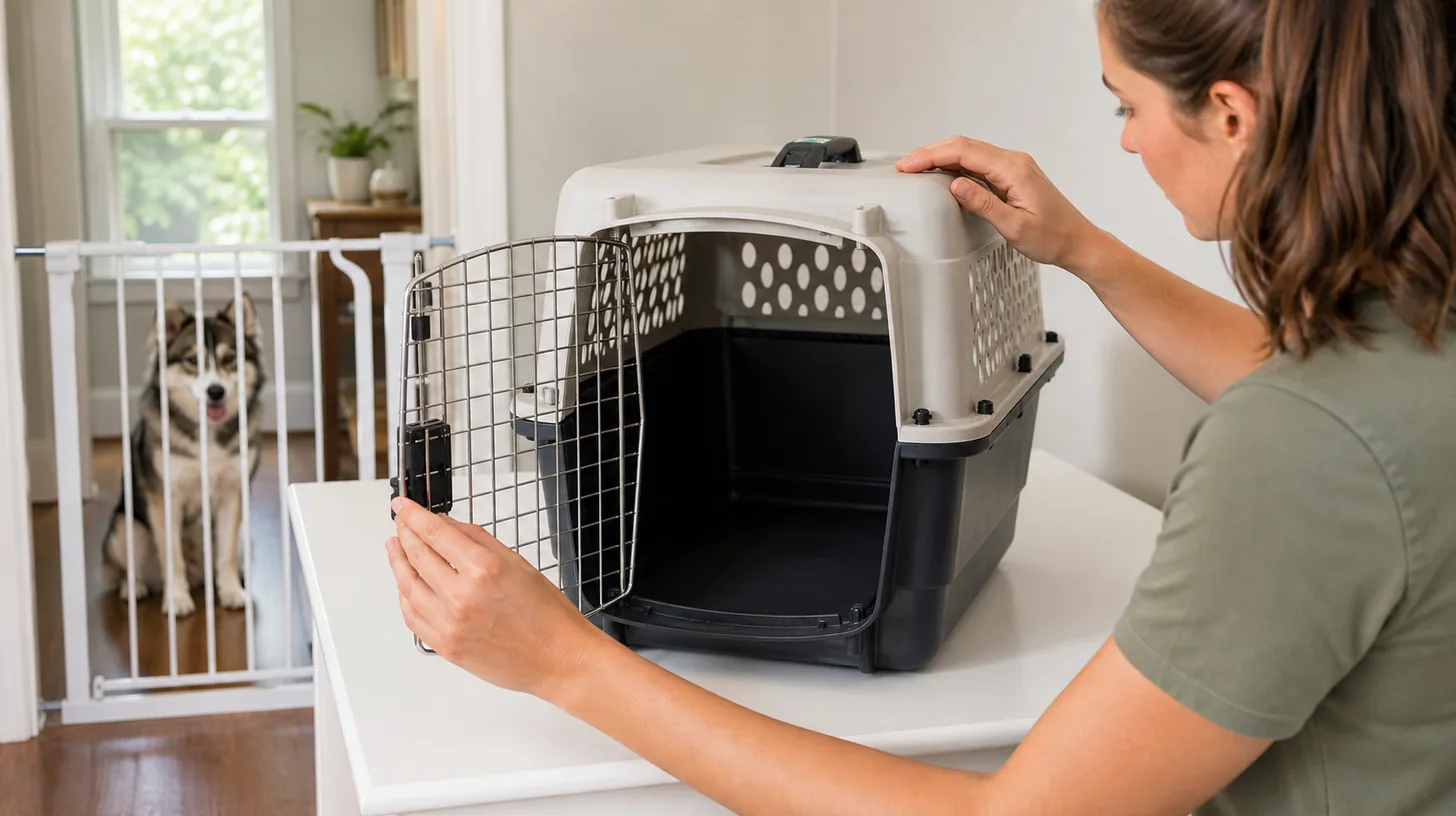
Direct answer: Inspect the empty carrier on a stable surface before every important trip. Check the shell and seams, floor, ventilation, door alignment, hinge pins, latch engagement, fasteners, handle, wheels if present, bedding, and identification attachment. Operate the door repeatedly without the dog inside. Retire or professionally resolve cracked, distorted, loose, sharp, or unreliable equipment instead of testing it with the Pomsky.
Carrier training cannot compensate for a door that misaligns, a hinge pin that lifts out, or a shell that flexes around loose fasteners. Inspecting the carrier while it is empty separates equipment testing from dog handling. The result is a clear decision: the carrier is intact and configured for the planned use, or it remains out of service until the damage or requirement is resolved.
Identify the Exact Carrier
Record the carrier model or distinguishing details, intended trip, current instructions, and any transport-provider requirements before evaluating fit or hardware.
Treat this as one part of the complete routine, not an isolated trick. The surrounding setup is a stable well-lit table or floor with the Pomsky secured elsewhere. A clean transition reduces ambiguity and makes it easier to notice when the dog, equipment, environment, or records differ from the previous attempt. For this page, step 1 is specifically the identify the exact carrier check.
If the Pomsky cannot remain comfortable or the equipment and environment cannot remain controlled, end the attempt. Do not proceed through testing damage with the dog inside, improvised repairs, sharp edges, loose pins, partial latch engagement, obstructed vents, unstable handles, or outdated transport assumptions. Capture carrier identity, date, use, shell and door findings, hardware operation, cleaning, damage, action taken, and provider requirement checked before deciding what changes next. Record the outcome of identify the exact carrier separately before moving on.
Empty and Clean the Interior
Remove the dog, bedding, bowls, labels, and accessories so the floor, seams, corners, vents, and fasteners can be seen directly.
Pause long enough to inspect the result rather than assuming the action worked. Look at the dog, the physical boundary, and the next movement available to the caregiver. Continue only when the arrangement still supports an empty carrier with reliable structure, ventilation, floor, door, hardware, handling points, and identification. For this page, step 2 is specifically the empty and clean the interior check.
The absence of an incident is not proof that the arrangement is sound. Recheck for testing damage with the dog inside, improvised repairs, sharp edges, loose pins, partial latch engagement, obstructed vents, unstable handles, or outdated transport assumptions. Document carrier identity, date, use, shell and door findings, hardware operation, cleaning, damage, action taken, and provider requirement checked so a later caregiver can distinguish a passed step from one that was skipped. Record the outcome of empty and clean the interior separately before moving on.
Inspect the Upper and Lower Shell
Look for cracks, whitening, distortion, missing material, separation, punctures, heat damage, and movement where shell halves join.
A second capable adult can verify the boundary during early practice or higher-risk situations. That person should follow the same sequence and avoid adding prompts, handling, or access that changes the task. The shared standard remains an empty carrier with reliable structure, ventilation, floor, door, hardware, handling points, and identification. For this page, step 3 is specifically the inspect the upper and lower shell check.
Stop when the expected condition is absent or the situation begins to depend on force, luck, or an open boundary. Specifically avoid testing damage with the dog inside, improvised repairs, sharp edges, loose pins, partial latch engagement, obstructed vents, unstable handles, or outdated transport assumptions. The follow-up record should cover carrier identity, date, use, shell and door findings, hardware operation, cleaning, damage, action taken, and provider requirement checked. Record the outcome of inspect the upper and lower shell separately before moving on.
Check the Floor Under Load
Press the empty floor by hand on a stable surface and inspect for flex, sharp projections, liquid traps, unstable inserts, or damage hidden by bedding.
Perform this check before adding the next variable. The target remains an empty carrier with reliable structure, ventilation, floor, door, hardware, handling points, and identification. Work in a stable well-lit table or floor with the Pomsky secured elsewhere. If the setup cannot preserve that condition, simplify it or stop rather than relying on speed or physical control. For this page, step 4 is specifically the check the floor under load check.
Do not convert this step into a stress test. The principal avoidable risks are testing damage with the dog inside, improvised repairs, sharp edges, loose pins, partial latch engagement, obstructed vents, unstable handles, or outdated transport assumptions. Write down carrier identity, date, use, shell and door findings, hardware operation, cleaning, damage, action taken, and provider requirement checked; a short factual note is more useful than a reassuring guess. Record the outcome of check the floor under load separately before moving on.
Examine Every Vent
Confirm openings are unobstructed, smooth, structurally intact, and not modified by covers, ties, bowls, labels, or stored accessories.
Use an observable pass condition: the relevant item is checked, the boundary is closed, and the Pomsky can remain safe without being used as a test. This protects the main objective, an empty carrier with reliable structure, ventilation, floor, door, hardware, handling points, and identification, while leaving a clear point at which the caregiver can step back. For this page, step 5 is specifically the examine every vent check.
If the Pomsky cannot remain comfortable or the equipment and environment cannot remain controlled, end the attempt. Do not proceed through testing damage with the dog inside, improvised repairs, sharp edges, loose pins, partial latch engagement, obstructed vents, unstable handles, or outdated transport assumptions. Capture carrier identity, date, use, shell and door findings, hardware operation, cleaning, damage, action taken, and provider requirement checked before deciding what changes next. Record the outcome of examine every vent separately before moving on.
Align the Door Without Force
Swing or place the door into its normal closed position and verify even seating at the top, bottom, hinge side, and latch side.
Keep the sequence repeatable across caregivers. Say what is being checked, complete it, and return equipment and people to neutral before continuing. In this page's context, success means an empty carrier with reliable structure, ventilation, floor, door, hardware, handling points, and identification; it does not mean proving that a known risk can be tolerated. For this page, step 6 is specifically the align the door without force check.
The absence of an incident is not proof that the arrangement is sound. Recheck for testing damage with the dog inside, improvised repairs, sharp edges, loose pins, partial latch engagement, obstructed vents, unstable handles, or outdated transport assumptions. Document carrier identity, date, use, shell and door findings, hardware operation, cleaning, damage, action taken, and provider requirement checked so a later caregiver can distinguish a passed step from one that was skipped. Record the outcome of align the door without force separately before moving on.
Inspect Hinge Pins and Retainers
Check that pins are straight, fully seated, retained as designed, and unable to migrate when the door is operated repeatedly.
Treat this as one part of the complete routine, not an isolated trick. The surrounding setup is a stable well-lit table or floor with the Pomsky secured elsewhere. A clean transition reduces ambiguity and makes it easier to notice when the dog, equipment, environment, or records differ from the previous attempt. For this page, step 7 is specifically the inspect hinge pins and retainers check.
Stop when the expected condition is absent or the situation begins to depend on force, luck, or an open boundary. Specifically avoid testing damage with the dog inside, improvised repairs, sharp edges, loose pins, partial latch engagement, obstructed vents, unstable handles, or outdated transport assumptions. The follow-up record should cover carrier identity, date, use, shell and door findings, hardware operation, cleaning, damage, action taken, and provider requirement checked. Record the outcome of inspect hinge pins and retainers separately before moving on.
Operate Every Latch
Close and open each latch several times, observing full engagement and release without sticking, partial capture, bending, or dependence on shell pressure.
Pause long enough to inspect the result rather than assuming the action worked. Look at the dog, the physical boundary, and the next movement available to the caregiver. Continue only when the arrangement still supports an empty carrier with reliable structure, ventilation, floor, door, hardware, handling points, and identification. For this page, step 8 is specifically the operate every latch check.
Do not convert this step into a stress test. The principal avoidable risks are testing damage with the dog inside, improvised repairs, sharp edges, loose pins, partial latch engagement, obstructed vents, unstable handles, or outdated transport assumptions. Write down carrier identity, date, use, shell and door findings, hardware operation, cleaning, damage, action taken, and provider requirement checked; a short factual note is more useful than a reassuring guess. Record the outcome of operate every latch separately before moving on.
Check Fasteners and Side Hardware
Inspect bolts, clips, ties, locks, bowl mounts, wheel fittings, and unused openings against current instructions rather than adding improvised parts.
A second capable adult can verify the boundary during early practice or higher-risk situations. That person should follow the same sequence and avoid adding prompts, handling, or access that changes the task. The shared standard remains an empty carrier with reliable structure, ventilation, floor, door, hardware, handling points, and identification. For this page, step 9 is specifically the check fasteners and side hardware check.
If the Pomsky cannot remain comfortable or the equipment and environment cannot remain controlled, end the attempt. Do not proceed through testing damage with the dog inside, improvised repairs, sharp edges, loose pins, partial latch engagement, obstructed vents, unstable handles, or outdated transport assumptions. Capture carrier identity, date, use, shell and door findings, hardware operation, cleaning, damage, action taken, and provider requirement checked before deciding what changes next. Record the outcome of check fasteners and side hardware separately before moving on.
Test Handles Without the Dog
Lift and gently reposition the empty carrier by approved handling points, checking attachment movement and shell distortion before adding permitted test weight.
Perform this check before adding the next variable. The target remains an empty carrier with reliable structure, ventilation, floor, door, hardware, handling points, and identification. Work in a stable well-lit table or floor with the Pomsky secured elsewhere. If the setup cannot preserve that condition, simplify it or stop rather than relying on speed or physical control. For this page, step 10 is specifically the test handles without the dog check.
The absence of an incident is not proof that the arrangement is sound. Recheck for testing damage with the dog inside, improvised repairs, sharp edges, loose pins, partial latch engagement, obstructed vents, unstable handles, or outdated transport assumptions. Document carrier identity, date, use, shell and door findings, hardware operation, cleaning, damage, action taken, and provider requirement checked so a later caregiver can distinguish a passed step from one that was skipped. Record the outcome of test handles without the dog separately before moving on.
Review Bedding and Identification
Use a stable absorbent layer that does not block the door or vents, and attach current identification where it cannot become a chew or snag hazard.
Use an observable pass condition: the relevant item is checked, the boundary is closed, and the Pomsky can remain safe without being used as a test. This protects the main objective, an empty carrier with reliable structure, ventilation, floor, door, hardware, handling points, and identification, while leaving a clear point at which the caregiver can step back. For this page, step 11 is specifically the review bedding and identification check.
Stop when the expected condition is absent or the situation begins to depend on force, luck, or an open boundary. Specifically avoid testing damage with the dog inside, improvised repairs, sharp edges, loose pins, partial latch engagement, obstructed vents, unstable handles, or outdated transport assumptions. The follow-up record should cover carrier identity, date, use, shell and door findings, hardware operation, cleaning, damage, action taken, and provider requirement checked. Record the outcome of review bedding and identification separately before moving on.
Make an Explicit Service Decision
Mark the carrier ready only when every relevant check passes; otherwise label it out of service and replace or professionally resolve it before loading the Pomsky.
Keep the sequence repeatable across caregivers. Say what is being checked, complete it, and return equipment and people to neutral before continuing. In this page's context, success means an empty carrier with reliable structure, ventilation, floor, door, hardware, handling points, and identification; it does not mean proving that a known risk can be tolerated. For this page, step 12 is specifically the make an explicit service decision check.
Do not convert this step into a stress test. The principal avoidable risks are testing damage with the dog inside, improvised repairs, sharp edges, loose pins, partial latch engagement, obstructed vents, unstable handles, or outdated transport assumptions. Write down carrier identity, date, use, shell and door findings, hardware operation, cleaning, damage, action taken, and provider requirement checked; a short factual note is more useful than a reassuring guess. Record the outcome of make an explicit service decision separately before moving on.
When to Escalate
This routine has a defined boundary. Stop when the Pomsky, caregiver, equipment, records, or environment no longer supports an empty carrier with reliable structure, ventilation, floor, door, hardware, handling points, and identification. Do not improvise through testing damage with the dog inside, improvised repairs, sharp edges, loose pins, partial latch engagement, obstructed vents, unstable handles, or outdated transport assumptions. Seek the manufacturer or qualified equipment professional for damage and the current carrier, airline, rail, or other transport provider for acceptance rules. Bring the concise observations already recorded rather than recreating the event.
Before the next attempt, review carrier identity, date, use, shell and door findings, hardware operation, cleaning, damage, action taken, and provider requirement checked. Reopen the task only after the physical setup, instructions, and responsible person are clear. A conservative stop is useful information: it prevents a manageable problem from becoming an emergency and gives the appropriate professional a factual starting point.
Sources reviewed
Each source is used only for the claim scopes listed below. None establishes a guaranteed Pomsky outcome or replaces individual professional assessment.
- USDA Animal and Plant Health Inspection Service: Preparing Your Pet for Air Travel - Supports: carrier suitability; air-travel readiness; health and documentation planning. Limit: Airline, destination, and timing requirements vary; readers must verify current carrier and government rules for the exact trip.
- American Animal Hospital Association: Lifestyle and Safety Assessment - Supports: appropriate confinement; leash, collar and harness planning; lifestyle-specific safety review. Limit: Equipment selection must account for the individual dog's anatomy, behavior, health, and environment.
- American Kennel Club: The Importance of a Well-Fitting Harness - Supports: harness measurement; strap clearance; shoulder movement; escape and chafing checks. Limit: No harness corrects pulling by itself or fits every body shape; pain, rubbing, or gait change needs reassessment.