Written and reviewed by A Pomsky Editorial Team. Originally published 2026-07-26; substantively reviewed July 26, 2026.
Training boundary: Use humane, reward-based methods and protect safety with management. Pain, panic, aggression, a bite history, or serious handling risk requires a veterinarian or qualified behavior professional. Read the editorial policy.
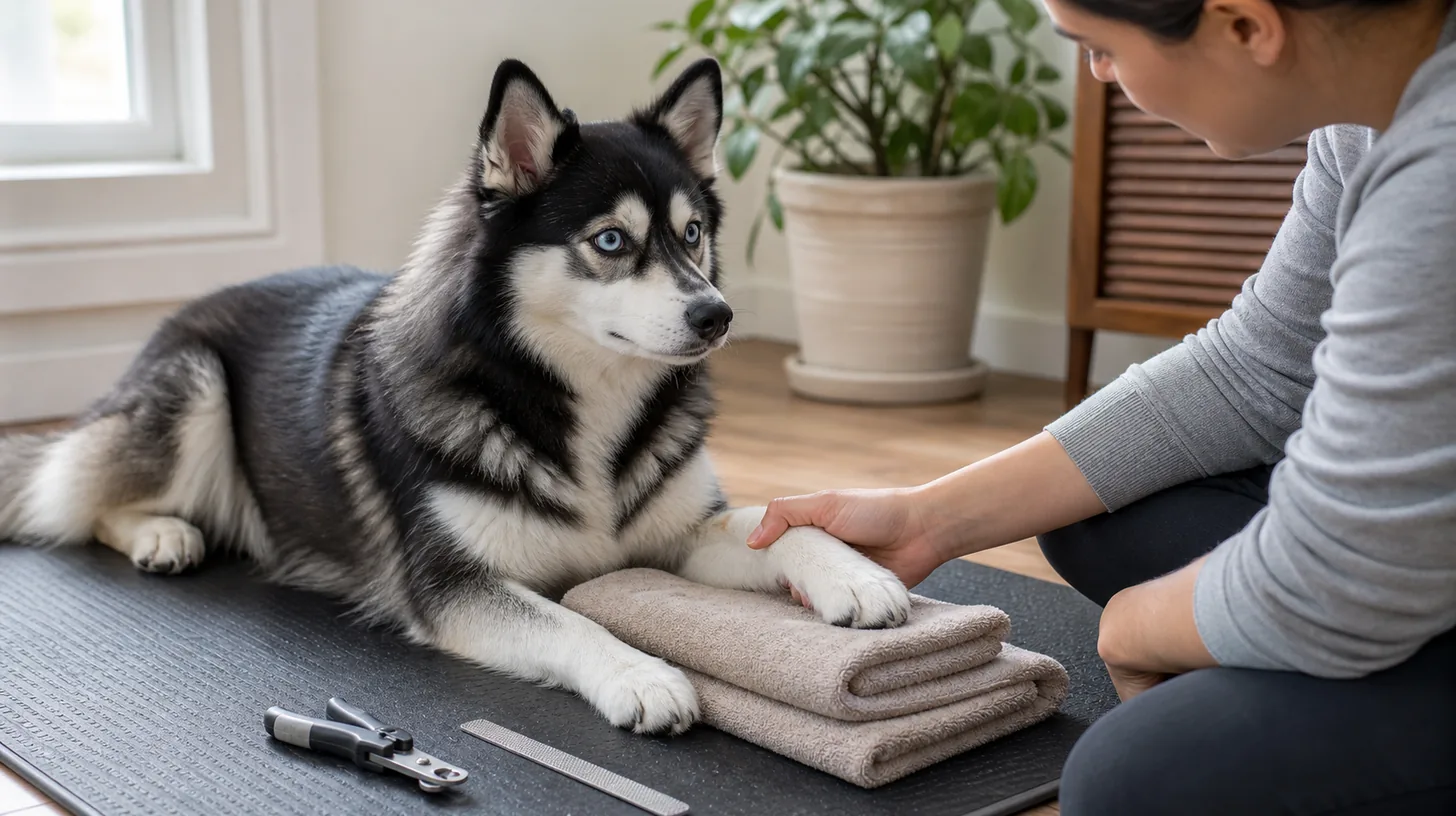
Direct answer: Prepare a Pomsky for nail trims by first rewarding voluntary paw presentation on a stable surface. Add one brief touch at a time, release the paw before the dog pulls away, and introduce the inactive tool separately. Only progress while the dog remains loose and willing. Stop for pain, panic, repeated withdrawal, unsafe movement, or uncertainty about nail anatomy.
Cooperative paw handling begins before a nail is cut. Teach the Pomsky to offer a paw or keep it on a stable target, reward very brief touches, introduce the tool separately, and use a clear release. Pain, severe fear, bite risk, or unsafe movement should stop the session and prompt professional help.
Check for Pain and Handling Risk
Look for limping, swelling, heat, broken nails, bleeding, licking, a foreign object, or sudden sensitivity. A dog that previously accepted paw handling but now resists may be communicating pain. Ask a veterinarian to assess new or concerning signs before treating the response as a training problem.
Consider the handler's safety too. Do not begin close paw work when the dog has a bite history, severe panic, or guarding around touch. A veterinary team or qualified behavior professional can help create an appropriate handling plan.
Set Up a Stable Practice Area
Use a non-slip surface with good lighting and enough room for the dog to move away. Prepare tiny rewards and put all sharp tools out of reach. The Pomsky should not be balanced on a slippery table or held in an awkward position.
Choose a start behavior, such as placing one paw on a low towel target or offering a paw into an open hand. Choose a release word that ends the repetition. The release must be honored; it is not a pause before immediately grabbing the paw again.
Reward Voluntary Paw Presentation
Mark and reward any movement of the paw toward the target or hand. At first, do not hold it. Build from a brief touch to one second of relaxed contact. Deliver the reward so the dog can reset its body naturally.
If the Pomsky pulls away, let go. Reduce duration or return to an earlier step. Do not squeeze harder, pin the leg, roll the dog over, or use intimidation. Humane handling protects warning signals and makes future care safer.
Add Touch in Small Pieces
When voluntary presentation is predictable, touch the shoulder, slide briefly down the leg, touch the top of the paw, and then release. Train each area separately. Later, touch one toe or gently separate coat so the nail can be seen.
Watch the whole dog: muscle tension, head turns, lip licking, panting, freezing, wide eyes, refusal of food, and attempts to leave all matter. A paw that remains in your hand does not prove comfort if the rest of the body is distressed.
Introduce the Nail Tool Without Cutting
The existing nail-trimmer guide can help select an appropriate tool, but tool selection and cooperative handling are different tasks. Show the tool at a distance, reward calm observation, and put it away. Progress to moving it near the paw and briefly touching the handle to a nail.
For a grinder, introduce the sound and vibration at a distance before bringing it near the dog. Do not run a noisy tool beside a frightened Pomsky until the dog stops reacting. Lower intensity and build a positive prediction instead.
Rehearse the Cutting Sequence
Practice the sequence with no cut: paw presentation, brief hold, visual nail check, tool approach, release, reward. Repeat until each step is comfortable. Then ask a veterinarian or experienced groomer to demonstrate safe nail anatomy and tool use if you are not confident.
Never cut blindly through coat or rush because the dog is “finally still.” Dark nails, long quicks, movement, and poor visibility increase risk. The goal of this page is handling preparation, not teaching anatomy or replacing hands-on instruction.
Make the First Real Trim Small
When the dog, handler, lighting, and tool setup are all ready, trim only a safe minimal amount from one nail and finish. A successful single nail can be a complete session. Keep styptic supplies recommended by your professional available, but do not let their presence justify risky cutting.
If bleeding occurs, the dog becomes distressed, or the handler loses a clear view, stop. Follow veterinary guidance for bleeding that does not stop promptly, a split nail, significant pain, or another injury.
Use Professional Grooming Strategically
Some Pomskies need professional nail care while cooperative skills are built. Tell the groomer or veterinary team what the dog can currently tolerate, what rewards work, and what signs cause the session to stop. Do not conceal a bite history or previous panic.
Medication or sedation decisions belong to a veterinarian. Do not give human medication, leftover prescriptions, or unverified calming products to force a grooming procedure. A slower training plan and an appropriate clinical plan can coexist.
Maintain the Skill Between Trims
Practice easy paw presentations and one-second touches when no trimming is planned. Check paws after walks and grooming without turning every contact into a long procedure. Keep sessions short enough that the dog willingly returns.
Cooperative paw handling does not guarantee that every nail can be trimmed at home. Its value is clearer communication, safer setup, and a gradual path toward necessary care. Progress is measured by voluntary participation and recovery, not by overpowering resistance.
Keep a Nail-Care Progress Record
After each session, record which paw was offered, the longest comfortable touch, whether the tool was visible or active, whether a nail was cut, and how quickly the Pomsky returned to normal activity. Use simple observations rather than labels such as stubborn or dramatic. The record should reveal whether difficulty is tied to one limb, one tool, one handler, or session length.
Photograph a damaged nail only when the dog can stand naturally and the image does not delay veterinary care. Do not repeatedly manipulate a painful toe to obtain a better picture. Share the timeline with the veterinarian or groomer when tolerance changes.
Include the professional care schedule and the date each paw was completed. This prevents repeated work on one paw while another is missed. It also helps the household avoid attempting a trim too soon after a difficult session.
Before handing care to a sitter, groomer, or new household member, explain the start behavior, release, stop signals, bite history, and current level. A person should not assume that cooperation with one trusted handler transfers automatically. The record supports continuity while preserving the dog's right to communicate discomfort.
Sources reviewed
Each source is used only for the claim scopes listed below. None establishes a guaranteed Pomsky outcome or replaces individual professional assessment.
- American Veterinary Society of Animal Behavior: Humane Dog Training Position Statement - Supports: reward-based training; aversive-method risk; behavior change principles. Limit: Does not guarantee outcomes for an individual dog.
- American Animal Hospital Association: Humane Restraint of Animals - Supports: least-stress handling; basket muzzle preparation; positive behavior modification. Limit: Does not authorize forceful restraint or replace veterinary handling decisions.