Written and reviewed by A Pomsky Editorial Team. Originally published 2026-07-26; substantively reviewed July 26, 2026.
Training boundary: Use humane, reward-based methods and protect safety with management. Pain, panic, aggression, a bite history, or serious handling risk requires a veterinarian or qualified behavior professional. Read the editorial policy.
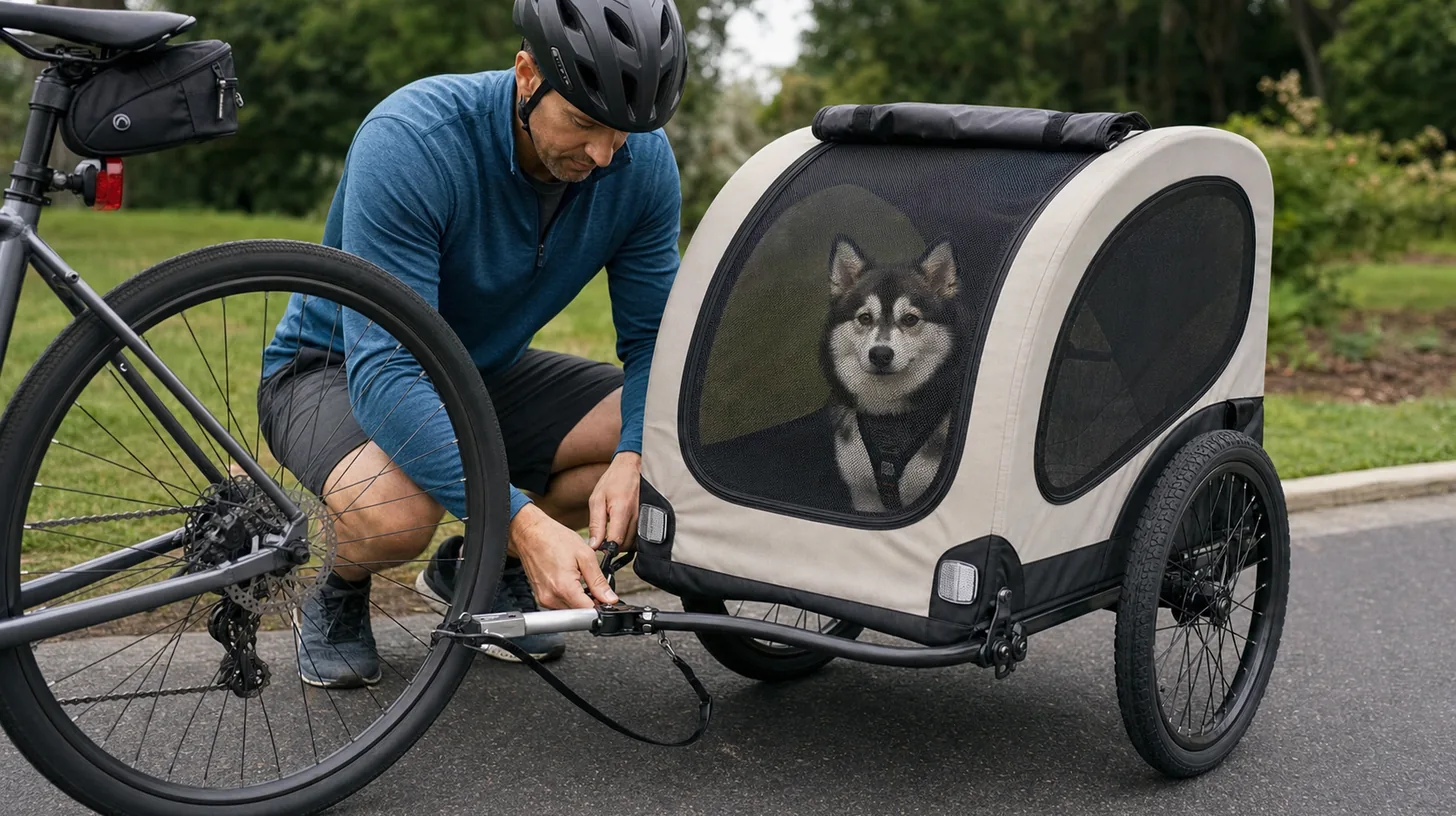
Direct answer: Confirm that the bicycle, trailer and Pomsky meet every manufacturer limit. Inspect the trailer frame, wheels, tires, hitch, backup retention, floor, enclosure, visibility equipment and approved internal restraint before loading. Condition the Pomsky in the stationary trailer first, perform unloaded equipment testing, then use only a conservative low-speed route. Stop for every adjustment and unload the dog before disconnecting or folding the trailer.
A bicycle trailer is a towed compartment whose stability depends on the bicycle, hitch, backup retention, frame, wheels, tires, load distribution, enclosure and rider control. Road surface, traffic, turns, braking, noise and heat create conditions that cannot be reproduced by placing a dog in a parked trailer. Preparation must separate equipment inspection, stationary conditioning, unloaded testing, controlled loading and a conservative route with an immediate return.
Confirm Bicycle Trailer and Load Limits
Verify compatibility, total load, dog dimensions, permitted use, speed, terrain, attachment and maintenance through current manufacturer directions.
Perform this check before adding the next variable. The target remains one bicycle-trailer session completed within current limits with bicycle compatibility, frame, wheels, tires, hitch, backup retention, floor, enclosure, visibility, approved restraint, loading, test route, stops, unloading and storage reconciled. Work in a compatible maintained bicycle and intact suitable trailer with current directions, fitted Pomsky equipment, level loading area, capable rider, helper when needed, low-traffic cool test route, visibility equipment and abort plan. If the setup cannot preserve that condition, simplify it or stop rather than relying on speed or physical control. In this routine, step 1 is the confirm bicycle trailer and load limits decision.
Stop when the expected condition is absent or the situation begins to depend on force, luck, or an open boundary. Specifically avoid incompatible hitch, missing backup retention, loose wheel, low tire, damaged frame, weak floor, open enclosure, unsuitable tether, neck loading, poor visibility, heat, road debris, sharp turn, long stopping distance, traffic, tipping, disconnecting while loaded or distracted riding. The follow-up record should cover bicycle, trailer model, limits, frame, wheels, tires, axle, hitch, backup retention, floor, enclosure, visibility, attachment, dog equipment, loading, unloaded test, loaded test, route, stops, unloading and storage. Record the result of confirm bicycle trailer and load limits before continuing.
Inspect Frame Floor and Enclosure
Check tubes, joints, fabric, seams, floor support, mesh, weather panels, door openings, latches and load area for wear, deformation or damage.
Use an observable pass condition: the relevant item is checked, the boundary is closed, and the Pomsky can remain safe without being used as a test. This protects the main objective, one bicycle-trailer session completed within current limits with bicycle compatibility, frame, wheels, tires, hitch, backup retention, floor, enclosure, visibility, approved restraint, loading, test route, stops, unloading and storage reconciled, while leaving a clear point at which the caregiver can step back. In this routine, step 2 is the inspect frame floor and enclosure decision.
The absence of an incident is not proof that the arrangement is sound. Recheck for incompatible hitch, missing backup retention, loose wheel, low tire, damaged frame, weak floor, open enclosure, unsuitable tether, neck loading, poor visibility, heat, road debris, sharp turn, long stopping distance, traffic, tipping, disconnecting while loaded or distracted riding. Document bicycle, trailer model, limits, frame, wheels, tires, axle, hitch, backup retention, floor, enclosure, visibility, attachment, dog equipment, loading, unloaded test, loaded test, route, stops, unloading and storage so a later caregiver can distinguish a passed step from one that was skipped. Record the result of inspect frame floor and enclosure before continuing.
Inspect Wheels Tires and Axles
Confirm wheel retention, axle condition, tire pressure under directions, tread, sidewalls, bearings, alignment and clear rotation before every trip.
Keep the sequence repeatable across caregivers. Say what is being checked, complete it, and return equipment and people to neutral before continuing. In this page's context, success means one bicycle-trailer session completed within current limits with bicycle compatibility, frame, wheels, tires, hitch, backup retention, floor, enclosure, visibility, approved restraint, loading, test route, stops, unloading and storage reconciled; it does not mean proving that a known risk can be tolerated. In this routine, step 3 is the inspect wheels tires and axles decision.
If the Pomsky cannot remain comfortable or the equipment and environment cannot remain controlled, end the attempt. Do not proceed through incompatible hitch, missing backup retention, loose wheel, low tire, damaged frame, weak floor, open enclosure, unsuitable tether, neck loading, poor visibility, heat, road debris, sharp turn, long stopping distance, traffic, tipping, disconnecting while loaded or distracted riding. Capture bicycle, trailer model, limits, frame, wheels, tires, axle, hitch, backup retention, floor, enclosure, visibility, attachment, dog equipment, loading, unloaded test, loaded test, route, stops, unloading and storage before deciding what changes next. Record the result of inspect wheels tires and axles before continuing.
Inspect Hitch and Backup Retention
Attach exactly as directed, verify the hitch lock and separate backup retention and ensure neither interferes with wheel, brake, frame or rider movement.
Treat this as one part of the complete routine, not an isolated trick. The surrounding setup is a compatible maintained bicycle and intact suitable trailer with current directions, fitted Pomsky equipment, level loading area, capable rider, helper when needed, low-traffic cool test route, visibility equipment and abort plan. A clean transition reduces ambiguity and makes it easier to notice when the dog, equipment, environment, or records differ from the previous attempt. In this routine, step 4 is the inspect hitch and backup retention decision.
Do not convert this step into a stress test. The principal avoidable risks are incompatible hitch, missing backup retention, loose wheel, low tire, damaged frame, weak floor, open enclosure, unsuitable tether, neck loading, poor visibility, heat, road debris, sharp turn, long stopping distance, traffic, tipping, disconnecting while loaded or distracted riding. Write down bicycle, trailer model, limits, frame, wheels, tires, axle, hitch, backup retention, floor, enclosure, visibility, attachment, dog equipment, loading, unloaded test, loaded test, route, stops, unloading and storage; a short factual note is more useful than a reassuring guess. Record the result of inspect hitch and backup retention before continuing.
Inspect Visibility and Approved Restraint
Check reflectors, flag or lights as required and use only the directed internal attachment with suitable fitted dog equipment and no neck loading.
Pause long enough to inspect the result rather than assuming the action worked. Look at the dog, the physical boundary, and the next movement available to the caregiver. Continue only when the arrangement still supports one bicycle-trailer session completed within current limits with bicycle compatibility, frame, wheels, tires, hitch, backup retention, floor, enclosure, visibility, approved restraint, loading, test route, stops, unloading and storage reconciled. In this routine, step 5 is the inspect visibility and approved restraint decision.
Stop when the expected condition is absent or the situation begins to depend on force, luck, or an open boundary. Specifically avoid incompatible hitch, missing backup retention, loose wheel, low tire, damaged frame, weak floor, open enclosure, unsuitable tether, neck loading, poor visibility, heat, road debris, sharp turn, long stopping distance, traffic, tipping, disconnecting while loaded or distracted riding. The follow-up record should cover bicycle, trailer model, limits, frame, wheels, tires, axle, hitch, backup retention, floor, enclosure, visibility, attachment, dog equipment, loading, unloaded test, loaded test, route, stops, unloading and storage. Record the result of inspect visibility and approved restraint before continuing.
Condition the Stationary Trailer First
Practice voluntary entry, floor comfort, brief closure, small manual movement and calm exit on level secured ground before connecting a riding task.
A second capable adult can verify the boundary during early practice or higher-risk situations. That person should follow the same sequence and avoid adding prompts, handling, or access that changes the task. The shared standard remains one bicycle-trailer session completed within current limits with bicycle compatibility, frame, wheels, tires, hitch, backup retention, floor, enclosure, visibility, approved restraint, loading, test route, stops, unloading and storage reconciled. In this routine, step 6 is the condition the stationary trailer first decision.
The absence of an incident is not proof that the arrangement is sound. Recheck for incompatible hitch, missing backup retention, loose wheel, low tire, damaged frame, weak floor, open enclosure, unsuitable tether, neck loading, poor visibility, heat, road debris, sharp turn, long stopping distance, traffic, tipping, disconnecting while loaded or distracted riding. Document bicycle, trailer model, limits, frame, wheels, tires, axle, hitch, backup retention, floor, enclosure, visibility, attachment, dog equipment, loading, unloaded test, loaded test, route, stops, unloading and storage so a later caregiver can distinguish a passed step from one that was skipped. Record the result of condition the stationary trailer first before continuing.
Test Equipment Without the Pomsky
Tow the empty trailer under the directions and assess tracking, wheel noise, hitch movement, braking, turning, clearance and bicycle control.
Perform this check before adding the next variable. The target remains one bicycle-trailer session completed within current limits with bicycle compatibility, frame, wheels, tires, hitch, backup retention, floor, enclosure, visibility, approved restraint, loading, test route, stops, unloading and storage reconciled. Work in a compatible maintained bicycle and intact suitable trailer with current directions, fitted Pomsky equipment, level loading area, capable rider, helper when needed, low-traffic cool test route, visibility equipment and abort plan. If the setup cannot preserve that condition, simplify it or stop rather than relying on speed or physical control. In this routine, step 7 is the test equipment without the pomsky decision.
If the Pomsky cannot remain comfortable or the equipment and environment cannot remain controlled, end the attempt. Do not proceed through incompatible hitch, missing backup retention, loose wheel, low tire, damaged frame, weak floor, open enclosure, unsuitable tether, neck loading, poor visibility, heat, road debris, sharp turn, long stopping distance, traffic, tipping, disconnecting while loaded or distracted riding. Capture bicycle, trailer model, limits, frame, wheels, tires, axle, hitch, backup retention, floor, enclosure, visibility, attachment, dog equipment, loading, unloaded test, loaded test, route, stops, unloading and storage before deciding what changes next. Record the result of test equipment without the pomsky before continuing.
Load Close and Begin Conservatively
Set the bicycle and trailer stable, use a helper when needed, close and test every opening and start only on a cool low-conflict low-speed route.
Use an observable pass condition: the relevant item is checked, the boundary is closed, and the Pomsky can remain safe without being used as a test. This protects the main objective, one bicycle-trailer session completed within current limits with bicycle compatibility, frame, wheels, tires, hitch, backup retention, floor, enclosure, visibility, approved restraint, loading, test route, stops, unloading and storage reconciled, while leaving a clear point at which the caregiver can step back. In this routine, step 8 is the load close and begin conservatively decision.
Do not convert this step into a stress test. The principal avoidable risks are incompatible hitch, missing backup retention, loose wheel, low tire, damaged frame, weak floor, open enclosure, unsuitable tether, neck loading, poor visibility, heat, road debris, sharp turn, long stopping distance, traffic, tipping, disconnecting while loaded or distracted riding. Write down bicycle, trailer model, limits, frame, wheels, tires, axle, hitch, backup retention, floor, enclosure, visibility, attachment, dog equipment, loading, unloaded test, loaded test, route, stops, unloading and storage; a short factual note is more useful than a reassuring guess. Record the result of load close and begin conservatively before continuing.
Stop Fully for Every Check or Adjustment
Move completely out of traffic, stabilize the bicycle and trailer and stop before checking heat, posture, closure, tire, hitch, restraint or dropped equipment.
Keep the sequence repeatable across caregivers. Say what is being checked, complete it, and return equipment and people to neutral before continuing. In this page's context, success means one bicycle-trailer session completed within current limits with bicycle compatibility, frame, wheels, tires, hitch, backup retention, floor, enclosure, visibility, approved restraint, loading, test route, stops, unloading and storage reconciled; it does not mean proving that a known risk can be tolerated. In this routine, step 9 is the stop fully for every check or adjustment decision.
Stop when the expected condition is absent or the situation begins to depend on force, luck, or an open boundary. Specifically avoid incompatible hitch, missing backup retention, loose wheel, low tire, damaged frame, weak floor, open enclosure, unsuitable tether, neck loading, poor visibility, heat, road debris, sharp turn, long stopping distance, traffic, tipping, disconnecting while loaded or distracted riding. The follow-up record should cover bicycle, trailer model, limits, frame, wheels, tires, axle, hitch, backup retention, floor, enclosure, visibility, attachment, dog equipment, loading, unloaded test, loaded test, route, stops, unloading and storage. Record the result of stop fully for every check or adjustment before continuing.
Unload Before Disconnecting or Storage
Return to a level controlled area, secure the surroundings, unload the Pomsky, then disconnect, fold, clean, dry and store the trailer under directions.
Treat this as one part of the complete routine, not an isolated trick. The surrounding setup is a compatible maintained bicycle and intact suitable trailer with current directions, fitted Pomsky equipment, level loading area, capable rider, helper when needed, low-traffic cool test route, visibility equipment and abort plan. A clean transition reduces ambiguity and makes it easier to notice when the dog, equipment, environment, or records differ from the previous attempt. In this routine, step 10 is the unload before disconnecting or storage decision.
The absence of an incident is not proof that the arrangement is sound. Recheck for incompatible hitch, missing backup retention, loose wheel, low tire, damaged frame, weak floor, open enclosure, unsuitable tether, neck loading, poor visibility, heat, road debris, sharp turn, long stopping distance, traffic, tipping, disconnecting while loaded or distracted riding. Document bicycle, trailer model, limits, frame, wheels, tires, axle, hitch, backup retention, floor, enclosure, visibility, attachment, dog equipment, loading, unloaded test, loaded test, route, stops, unloading and storage so a later caregiver can distinguish a passed step from one that was skipped. Record the result of unload before disconnecting or storage before continuing.
When to Stop and Escalate
Stop when the Pomsky, caregiver, equipment, records, or environment no longer supports one bicycle-trailer session completed within current limits with bicycle compatibility, frame, wheels, tires, hitch, backup retention, floor, enclosure, visibility, approved restraint, loading, test route, stops, unloading and storage reconciled. Do not improvise through incompatible hitch, missing backup retention, loose wheel, low tire, damaged frame, weak floor, open enclosure, unsuitable tether, neck loading, poor visibility, heat, road debris, sharp turn, long stopping distance, traffic, tipping, disconnecting while loaded or distracted riding. Seek the bicycle, trailer and equipment manufacturers or qualified cycle service for compatibility and faults, local authorities for route rules, emergency services for collision danger, and veterinary care for injury or abnormal signs. Bring the factual observations already collected rather than recreating the event.
Before another attempt, review bicycle, trailer model, limits, frame, wheels, tires, axle, hitch, backup retention, floor, enclosure, visibility, attachment, dog equipment, loading, unloaded test, loaded test, route, stops, unloading and storage. Resume only after the responsible person, physical setup, and controlling instructions are clear. A stop is part of the protocol: it preserves useful evidence and prevents uncertainty from becoming exposure.
Keep the Routine Current
Recheck the complete setup whenever the dog, household, product, instructions, environment, or purpose changes. The intended outcome remains one bicycle-trailer session completed within current limits with bicycle compatibility, frame, wheels, tires, hitch, backup retention, floor, enclosure, visibility, approved restraint, loading, test route, stops, unloading and storage reconciled, not a perfect-looking performance. Use the newest primary instruction, retain dated records, and retire superseded assumptions so every caregiver begins from the same current plan.
Sources reviewed
Each source is used only for the claim scopes listed below. None establishes a guaranteed Pomsky outcome or replaces individual professional assessment.
- American Animal Hospital Association: Lifestyle and Safety Assessment - Supports: appropriate confinement; leash, collar and harness planning; lifestyle-specific safety review. Limit: Equipment selection must account for the individual dog's anatomy, behavior, health, and environment.
- American Kennel Club: The Importance of a Well-Fitting Harness - Supports: harness measurement; strap clearance; shoulder movement; escape and chafing checks. Limit: No harness corrects pulling by itself or fits every body shape; pain, rubbing, or gait change needs reassessment.
- U.S. Centers for Disease Control and Prevention: Pet Emergency Preparedness - Supports: evacuation planning; pet records; emergency supplies; disaster readiness. Limit: Local emergency authority instructions take priority.