Written and reviewed by A Pomsky Editorial Team. Originally published 2026-07-26; substantively reviewed July 26, 2026.
Training boundary: Use humane, reward-based methods and protect safety with management. Pain, panic, aggression, a bite history, or serious handling risk requires a veterinarian or qualified behavior professional. Read the editorial policy.
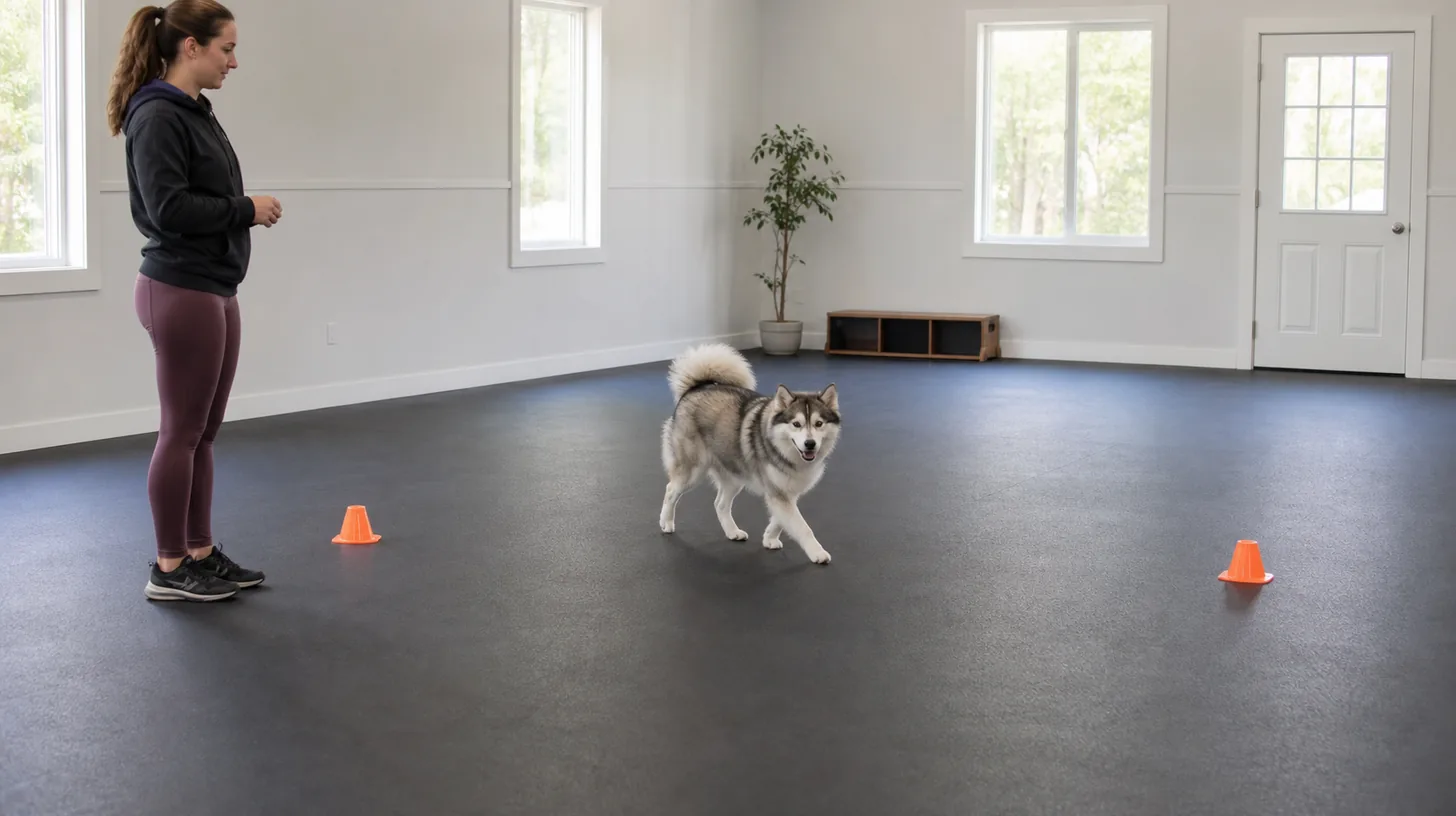
Direct answer: Place two broad stable markers far apart on level nonslip flooring. Teach one shallow loop around the first marker using a familiar target or route reward, then reset. Teach the opposite loop around the second marker in a separate set. Reward several feet along the continuing path rather than beside the cone. When both loops are comfortable, connect one loop to the crossing line and then the second loop. Add the figure-eight cue only after the complete route is predictable. Keep markers widely spaced and stop after one pattern. Stop for tight turning, clipping a marker, slipping, leash tangles, confusion, stiffness or fatigue.
This page links two wide object loops into one repeated crossing route; go-around owns a single object return, leg weave passes between a caregiver's legs, and left-right cues choose a continuing direction rather than a fixed two-marker pattern. Use low plain objects that will not tip, roll, trap paws or create sharp edges if touched. Leave a long straight crossing lane so each loop remains shallow and the Pomsky can see the next route. The plan keeps management, voluntary behavior, reinforcement and transition criteria explicit.
Choose Two Broad Stable Markers
Use low plain objects that will not tip, roll, trap paws or create sharp edges if touched.
A second capable adult can verify the boundary during early practice or higher-risk situations. That person should follow the same sequence and avoid adding prompts, handling, or access that changes the task. The shared standard remains Place two broad stable markers far apart on nonslip flooring, teach one shallow loop around each marker separately, reward along the continuing route, connect the two loops only after both directions are comfortable, add one figure-eight cue to the complete path, and stop for tight turns, slipping, leash tangles, confusion or fatigue.. In this routine, step 1 is the choose two broad stable markers decision.
Do not convert this step into a stress test. The principal avoidable risks are adding reward along the continuing route before teach the opposite loop separately is stable, skipping add the second loop, or continuing through pain, fear, guarding, unsafe equipment, loss of control or prolonged avoidance. Write down For How to Teach a Pomsky a Two-Cone Figure Eight, record Choose Two Broad Stable Markers, Space the Markers Widely, Teach the First Loop Alone, Teach the Opposite Loop Separately; compare Reward Along the Continuing Route, Connect One Loop to the Center, Add the Second Loop; then close with Name the Full Pattern Late, Limit Repetition and Direction Changes, Stop for Turning or Equipment Risk. Use dates, direct observations, transition quality and recovery.; a short factual note is more useful than a reassuring guess. Record the result of choose two broad stable markers before continuing.
Space the Markers Widely
Leave a long straight crossing lane so each loop remains shallow and the Pomsky can see the next route.
Perform this check before adding the next variable. The target remains Place two broad stable markers far apart on nonslip flooring, teach one shallow loop around each marker separately, reward along the continuing route, connect the two loops only after both directions are comfortable, add one figure-eight cue to the complete path, and stop for tight turns, slipping, leash tangles, confusion or fatigue.. Work in a controlled low-distraction setup for choose two broad stable markers, space the markers widely and teach the first loop alone, with nonslip footing, an open exit, suitable rewards and one adult handler. If the setup cannot preserve that condition, simplify it or stop rather than relying on speed or physical control. In this routine, step 2 is the space the markers widely decision.
Stop when the expected condition is absent or the situation begins to depend on force, luck, or an open boundary. Specifically avoid adding reward along the continuing route before teach the opposite loop separately is stable, skipping add the second loop, or continuing through pain, fear, guarding, unsafe equipment, loss of control or prolonged avoidance. The follow-up record should cover For How to Teach a Pomsky a Two-Cone Figure Eight, record Choose Two Broad Stable Markers, Space the Markers Widely, Teach the First Loop Alone, Teach the Opposite Loop Separately; compare Reward Along the Continuing Route, Connect One Loop to the Center, Add the Second Loop; then close with Name the Full Pattern Late, Limit Repetition and Direction Changes, Stop for Turning or Equipment Risk. Use dates, direct observations, transition quality and recovery.. Record the result of space the markers widely before continuing.
Teach the First Loop Alone
Guide one broad arc, mark departure onto the crossing line and reset before introducing the second marker.
Use an observable pass condition: the relevant item is checked, the boundary is closed, and the Pomsky can remain safe without being used as a test. This protects the main objective, Place two broad stable markers far apart on nonslip flooring, teach one shallow loop around each marker separately, reward along the continuing route, connect the two loops only after both directions are comfortable, add one figure-eight cue to the complete path, and stop for tight turns, slipping, leash tangles, confusion or fatigue., while leaving a clear point at which the caregiver can step back. In this routine, step 3 is the teach the first loop alone decision.
The absence of an incident is not proof that the arrangement is sound. Recheck for adding reward along the continuing route before teach the opposite loop separately is stable, skipping add the second loop, or continuing through pain, fear, guarding, unsafe equipment, loss of control or prolonged avoidance. Document For How to Teach a Pomsky a Two-Cone Figure Eight, record Choose Two Broad Stable Markers, Space the Markers Widely, Teach the First Loop Alone, Teach the Opposite Loop Separately; compare Reward Along the Continuing Route, Connect One Loop to the Center, Add the Second Loop; then close with Name the Full Pattern Late, Limit Repetition and Direction Changes, Stop for Turning or Equipment Risk. Use dates, direct observations, transition quality and recovery. so a later caregiver can distinguish a passed step from one that was skipped. Record the result of teach the first loop alone before continuing.
Teach the Opposite Loop Separately
Reverse the turning direction around the other marker while preserving the same wide spacing.
Keep the sequence repeatable across caregivers. Say what is being checked, complete it, and return equipment and people to neutral before continuing. In this page's context, success means Place two broad stable markers far apart on nonslip flooring, teach one shallow loop around each marker separately, reward along the continuing route, connect the two loops only after both directions are comfortable, add one figure-eight cue to the complete path, and stop for tight turns, slipping, leash tangles, confusion or fatigue.; it does not mean proving that a known risk can be tolerated. In this routine, step 4 is the teach the opposite loop separately decision.
If the Pomsky cannot remain comfortable or the equipment and environment cannot remain controlled, end the attempt. Do not proceed through adding reward along the continuing route before teach the opposite loop separately is stable, skipping add the second loop, or continuing through pain, fear, guarding, unsafe equipment, loss of control or prolonged avoidance. Capture For How to Teach a Pomsky a Two-Cone Figure Eight, record Choose Two Broad Stable Markers, Space the Markers Widely, Teach the First Loop Alone, Teach the Opposite Loop Separately; compare Reward Along the Continuing Route, Connect One Loop to the Center, Add the Second Loop; then close with Name the Full Pattern Late, Limit Repetition and Direction Changes, Stop for Turning or Equipment Risk. Use dates, direct observations, transition quality and recovery. before deciding what changes next. Record the result of teach the opposite loop separately before continuing.
Reward Along the Continuing Route
Deliver reinforcement after the turn and several feet away so the dog does not stop or pivot tightly at a cone.
Treat this as one part of the complete routine, not an isolated trick. The surrounding setup is a controlled low-distraction setup for choose two broad stable markers, space the markers widely and teach the first loop alone, with nonslip footing, an open exit, suitable rewards and one adult handler. A clean transition reduces ambiguity and makes it easier to notice when the dog, equipment, environment, or records differ from the previous attempt. In this routine, step 5 is the reward along the continuing route decision.
Do not convert this step into a stress test. The principal avoidable risks are adding reward along the continuing route before teach the opposite loop separately is stable, skipping add the second loop, or continuing through pain, fear, guarding, unsafe equipment, loss of control or prolonged avoidance. Write down For How to Teach a Pomsky a Two-Cone Figure Eight, record Choose Two Broad Stable Markers, Space the Markers Widely, Teach the First Loop Alone, Teach the Opposite Loop Separately; compare Reward Along the Continuing Route, Connect One Loop to the Center, Add the Second Loop; then close with Name the Full Pattern Late, Limit Repetition and Direction Changes, Stop for Turning or Equipment Risk. Use dates, direct observations, transition quality and recovery.; a short factual note is more useful than a reassuring guess. Record the result of reward along the continuing route before continuing.
Connect One Loop to the Center
Allow the Pomsky to cross the middle line after the known first loop without yet requiring the second loop.
Pause long enough to inspect the result rather than assuming the action worked. Look at the dog, the physical boundary, and the next movement available to the caregiver. Continue only when the arrangement still supports Place two broad stable markers far apart on nonslip flooring, teach one shallow loop around each marker separately, reward along the continuing route, connect the two loops only after both directions are comfortable, add one figure-eight cue to the complete path, and stop for tight turns, slipping, leash tangles, confusion or fatigue.. In this routine, step 6 is the connect one loop to the center decision.
Stop when the expected condition is absent or the situation begins to depend on force, luck, or an open boundary. Specifically avoid adding reward along the continuing route before teach the opposite loop separately is stable, skipping add the second loop, or continuing through pain, fear, guarding, unsafe equipment, loss of control or prolonged avoidance. The follow-up record should cover For How to Teach a Pomsky a Two-Cone Figure Eight, record Choose Two Broad Stable Markers, Space the Markers Widely, Teach the First Loop Alone, Teach the Opposite Loop Separately; compare Reward Along the Continuing Route, Connect One Loop to the Center, Add the Second Loop; then close with Name the Full Pattern Late, Limit Repetition and Direction Changes, Stop for Turning or Equipment Risk. Use dates, direct observations, transition quality and recovery.. Record the result of connect one loop to the center before continuing.
Add the Second Loop
Complete one shallow turn around the far marker and mark the return onto the center route.
A second capable adult can verify the boundary during early practice or higher-risk situations. That person should follow the same sequence and avoid adding prompts, handling, or access that changes the task. The shared standard remains Place two broad stable markers far apart on nonslip flooring, teach one shallow loop around each marker separately, reward along the continuing route, connect the two loops only after both directions are comfortable, add one figure-eight cue to the complete path, and stop for tight turns, slipping, leash tangles, confusion or fatigue.. In this routine, step 7 is the add the second loop decision.
The absence of an incident is not proof that the arrangement is sound. Recheck for adding reward along the continuing route before teach the opposite loop separately is stable, skipping add the second loop, or continuing through pain, fear, guarding, unsafe equipment, loss of control or prolonged avoidance. Document For How to Teach a Pomsky a Two-Cone Figure Eight, record Choose Two Broad Stable Markers, Space the Markers Widely, Teach the First Loop Alone, Teach the Opposite Loop Separately; compare Reward Along the Continuing Route, Connect One Loop to the Center, Add the Second Loop; then close with Name the Full Pattern Late, Limit Repetition and Direction Changes, Stop for Turning or Equipment Risk. Use dates, direct observations, transition quality and recovery. so a later caregiver can distinguish a passed step from one that was skipped. Record the result of add the second loop before continuing.
Name the Full Pattern Late
Say one cue before the first loop only after both loops and the crossing line are independently predictable.
Perform this check before adding the next variable. The target remains Place two broad stable markers far apart on nonslip flooring, teach one shallow loop around each marker separately, reward along the continuing route, connect the two loops only after both directions are comfortable, add one figure-eight cue to the complete path, and stop for tight turns, slipping, leash tangles, confusion or fatigue.. Work in a controlled low-distraction setup for choose two broad stable markers, space the markers widely and teach the first loop alone, with nonslip footing, an open exit, suitable rewards and one adult handler. If the setup cannot preserve that condition, simplify it or stop rather than relying on speed or physical control. In this routine, step 8 is the name the full pattern late decision.
If the Pomsky cannot remain comfortable or the equipment and environment cannot remain controlled, end the attempt. Do not proceed through adding reward along the continuing route before teach the opposite loop separately is stable, skipping add the second loop, or continuing through pain, fear, guarding, unsafe equipment, loss of control or prolonged avoidance. Capture For How to Teach a Pomsky a Two-Cone Figure Eight, record Choose Two Broad Stable Markers, Space the Markers Widely, Teach the First Loop Alone, Teach the Opposite Loop Separately; compare Reward Along the Continuing Route, Connect One Loop to the Center, Add the Second Loop; then close with Name the Full Pattern Late, Limit Repetition and Direction Changes, Stop for Turning or Equipment Risk. Use dates, direct observations, transition quality and recovery. before deciding what changes next. Record the result of name the full pattern late before continuing.
Limit Repetition and Direction Changes
Perform one complete pattern, reset fully and compare posture before deciding whether to repeat.
Use an observable pass condition: the relevant item is checked, the boundary is closed, and the Pomsky can remain safe without being used as a test. This protects the main objective, Place two broad stable markers far apart on nonslip flooring, teach one shallow loop around each marker separately, reward along the continuing route, connect the two loops only after both directions are comfortable, add one figure-eight cue to the complete path, and stop for tight turns, slipping, leash tangles, confusion or fatigue., while leaving a clear point at which the caregiver can step back. In this routine, step 9 is the limit repetition and direction changes decision.
Do not convert this step into a stress test. The principal avoidable risks are adding reward along the continuing route before teach the opposite loop separately is stable, skipping add the second loop, or continuing through pain, fear, guarding, unsafe equipment, loss of control or prolonged avoidance. Write down For How to Teach a Pomsky a Two-Cone Figure Eight, record Choose Two Broad Stable Markers, Space the Markers Widely, Teach the First Loop Alone, Teach the Opposite Loop Separately; compare Reward Along the Continuing Route, Connect One Loop to the Center, Add the Second Loop; then close with Name the Full Pattern Late, Limit Repetition and Direction Changes, Stop for Turning or Equipment Risk. Use dates, direct observations, transition quality and recovery.; a short factual note is more useful than a reassuring guess. Record the result of limit repetition and direction changes before continuing.
Stop for Turning or Equipment Risk
End for tight arcs, marker contact, slipping, crossed feet, leash tangles, stiffness, pain, confusion or fatigue.
Keep the sequence repeatable across caregivers. Say what is being checked, complete it, and return equipment and people to neutral before continuing. In this page's context, success means Place two broad stable markers far apart on nonslip flooring, teach one shallow loop around each marker separately, reward along the continuing route, connect the two loops only after both directions are comfortable, add one figure-eight cue to the complete path, and stop for tight turns, slipping, leash tangles, confusion or fatigue.; it does not mean proving that a known risk can be tolerated. In this routine, step 10 is the stop for turning or equipment risk decision.
Stop when the expected condition is absent or the situation begins to depend on force, luck, or an open boundary. Specifically avoid adding reward along the continuing route before teach the opposite loop separately is stable, skipping add the second loop, or continuing through pain, fear, guarding, unsafe equipment, loss of control or prolonged avoidance. The follow-up record should cover For How to Teach a Pomsky a Two-Cone Figure Eight, record Choose Two Broad Stable Markers, Space the Markers Widely, Teach the First Loop Alone, Teach the Opposite Loop Separately; compare Reward Along the Continuing Route, Connect One Loop to the Center, Add the Second Loop; then close with Name the Full Pattern Late, Limit Repetition and Direction Changes, Stop for Turning or Equipment Risk. Use dates, direct observations, transition quality and recovery.. Record the result of stop for turning or equipment risk before continuing.
When to Stop and Escalate
Stop when the Pomsky, caregiver, equipment, records, or environment no longer supports Place two broad stable markers far apart on nonslip flooring, teach one shallow loop around each marker separately, reward along the continuing route, connect the two loops only after both directions are comfortable, add one figure-eight cue to the complete path, and stop for tight turns, slipping, leash tangles, confusion or fatigue.. Do not improvise through adding reward along the continuing route before teach the opposite loop separately is stable, skipping add the second loop, or continuing through pain, fear, guarding, unsafe equipment, loss of control or prolonged avoidance. Seek a veterinarian for health or pain concerns and a qualified reward-based professional for exceptions during limit repetition and direction changes or stop for turning or equipment risk. Bring the factual observations already collected rather than recreating the event.
Before another attempt, review For How to Teach a Pomsky a Two-Cone Figure Eight, record Choose Two Broad Stable Markers, Space the Markers Widely, Teach the First Loop Alone, Teach the Opposite Loop Separately; compare Reward Along the Continuing Route, Connect One Loop to the Center, Add the Second Loop; then close with Name the Full Pattern Late, Limit Repetition and Direction Changes, Stop for Turning or Equipment Risk. Use dates, direct observations, transition quality and recovery.. Resume only after the responsible person, physical setup, and controlling instructions are clear. A stop is part of the protocol: it preserves useful evidence and prevents uncertainty from becoming exposure.
Keep the Routine Current
Recheck the complete setup whenever the dog, household, product, instructions, environment, or purpose changes. The intended outcome remains Place two broad stable markers far apart on nonslip flooring, teach one shallow loop around each marker separately, reward along the continuing route, connect the two loops only after both directions are comfortable, add one figure-eight cue to the complete path, and stop for tight turns, slipping, leash tangles, confusion or fatigue., not a perfect-looking performance. Use the newest primary instruction, retain dated records, and retire superseded assumptions so every caregiver begins from the same current plan.
Sources reviewed
Each source is used only for the claim scopes listed below. None establishes a guaranteed Pomsky outcome or replaces individual professional assessment.
- American Veterinary Society of Animal Behavior: Humane Dog Training Position Statement - Supports: reward-based training; aversive-method risk; behavior change principles. Limit: Does not guarantee outcomes for an individual dog.
- American Animal Hospital Association: Lifestyle and Safety Assessment - Supports: appropriate confinement; leash, collar and harness planning; lifestyle-specific safety review. Limit: Equipment selection must account for the individual dog's anatomy, behavior, health, and environment.